Thanks for the reply....
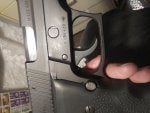
Yes, I did go ahead, using a .004" feeler-gauge blade, cut to 1/4" wide, and slightly rounded at the nose...and, in less than 30 seconds, had it out; just a little manipulating needed. Once out, the requisite positioning was self-evident...
Although, after the repositioning from left-handed operation, back to the original right-handed positioning...I found that mag insertion/engagement was stiff, requiring a good push to get past the catch, which I assume is ramped-and-rounded in the same manner/degree, on both sides, and the pressuring/base spring is the same, so can only assume that something is a bit off. Have replacements for all related parts coming, anyway, so will just swap it all out and start fresh...
Thanks, again, to the OP and all contributors; I was planning to drill out the catch, to extract, and replace, so this sure saved some fuss......